How to Fix Joy-Con Drift (2026): Repair & DIY Guide

Your character walks off a ledge on their own, the camera slowly spins, menus scroll without you touching anything — that is Joy-Con drift, and it is the most common hardware fault on the Nintendo Switch. The good news: most cases are fixable without buying anything, and the fix order matters. Work through this guide in order and stop as soon as the drift stops.
The short answer: test it on the calibration screen first, recalibrate, then clean around the stick base. If drift survives both, do not buy a replacement yet — check Nintendo's repair route first, because Nintendo has a long record of repairing drifting Joy-Cons free of charge in the US and other regions, including out-of-warranty cases. Only consider opening the controller or buying new Joy-Cons after that.
Which Fix Should You Try First?
Drift has two causes — dirt and wear — and each fix only works on one of them. This order goes from free and fast to last resort, so you never pay for a repair that a two-minute recalibration would have fixed.
| Fix | Cost | Time | Works when… |
|---|---|---|---|
| Calibration test + recalibration | Free | 2 minutes | Drift is mild or the stick's centre point has shifted |
| Compressed-air cleaning | Free / cheap | 5 minutes | Dust or debris under the stick is interfering with the sensor |
| Contact cleaner under the stick skirt | Cheap | 10 minutes | Cleaning alone did not work and you want one more no-open attempt |
| Nintendo repair | Often free for drift | Days to weeks | Drift persists — the stick itself is worn |
| DIY stick-module replacement | Parts only | 30–90 minutes | You are out of repair options and comfortable with small electronics |
| New Joy-Cons / magnetic replacement sticks | Most expensive | — | You want a permanent fix and the warranty no longer matters |
Is It Really Drift? Test It in 30 Seconds
Do this before anything else — a surprising number of "drift" cases are a game setting, not a broken stick. Detach the drifting Joy-Con, then go to System Settings → Controllers and Sensors → Calibrate Control Sticks and select it. On the test screen, leave the stick untouched: if the dot sits still, you do not have drift; if it creeps, wobbles, or sticks off-centre, you do.
- Rule out the game first. Some games use tilt controls that feel exactly like drift — Mario Kart 8 Deluxe's tilt steering is the classic example. Turn tilt off, and test the stick in the Home Menu or a second game before blaming the hardware.
- Test the other stick and a second controller. If both sticks drift, suspect a software or connection issue; if only one drifts, it is that stick's hardware.
- Try the quick checks. Update the controllers (System Settings → Controllers and Sensors → Update Controllers), detach and firmly reattach the Joy-Con, and restart the console. A bad connection can mimic drift symptoms, and these cost nothing to rule out.
Why Do Joy-Cons Drift in the First Place?
Joy-Con drift is not a software bug — it is a wear problem in a very small part. Inside each stick is a potentiometer: a tiny component that tracks the stick's position by sliding a metal contact wiper across a resistive track. Every movement scrapes that contact along the track, and over thousands of hours of play the track wears down or gets contaminated. Once the worn spot reads as slightly off-centre, the console sees directional input even when your thumb is nowhere near the stick.
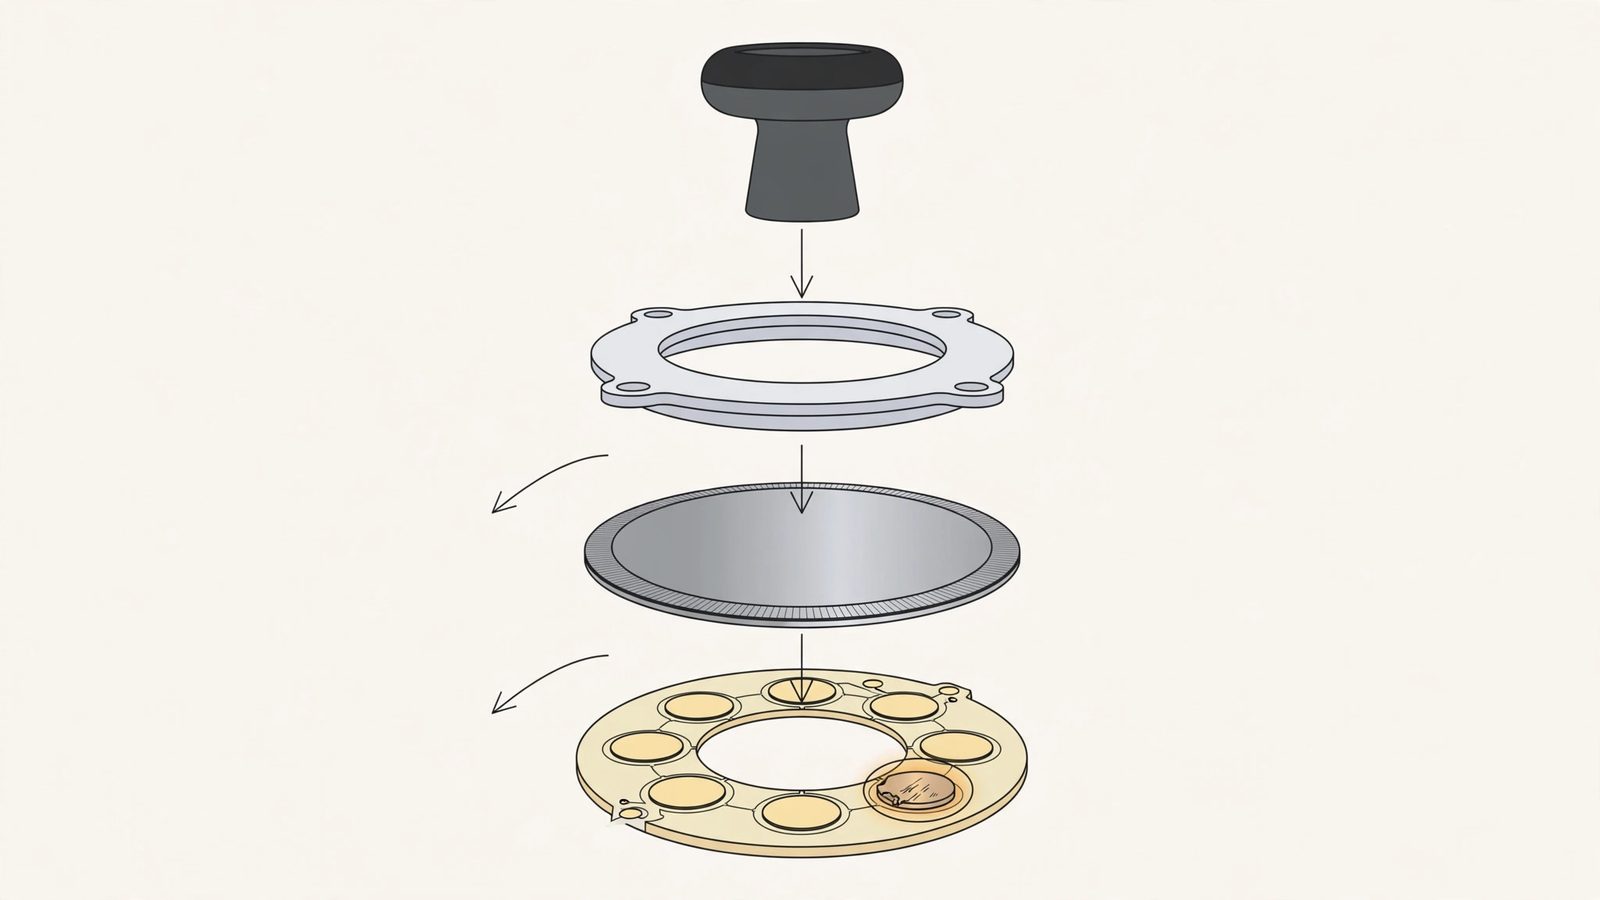
Two things make Joy-Cons drift more readily than full-size controllers. First, the parts are miniaturised — the same mechanism squeezed into a much smaller module, with less contact surface to wear through. Second, the stick base is relatively exposed, so dust, skin cells, and debris work their way under the rubber skirt and onto the contacts. That is why drift has two very different fixes: cleaning helps the dirt cases, and nothing short of repair or replacement helps the worn-out cases.
Can Recalibration Fix Joy-Con Drift?
Sometimes — but only when the drift is mild. Recalibration does not repair anything: it re-teaches the console where the stick's centre and full travel are. If the stick's sensor has only drifted slightly off-centre, a fresh calibration can mask that offset completely. If the contact track is genuinely worn, recalibration will help for a while and then the drift will creep back, because the underlying reading keeps changing.
To recalibrate: detach the drifting Joy-Con, go to System Settings → Controllers and Sensors → Calibrate Control Sticks, select the stick, and follow the prompts — slow, full circles, then push fully in each direction and return to centre. If a previous calibration looks wrong, choose Restore to Factory Defaults first, then recalibrate. Test again on the calibration screen immediately afterwards: a still dot means you are done; a creeping dot means move on to cleaning.
How Do I Clean a Drifting Joy-Con Without Opening It?
Cleaning fixes the dust cases, and it is the step most guides rush past. Power the Switch fully off and detach the Joy-Con first — never clean a powered-on controller.
- Compressed air. Spray short bursts around the base of the stick while slowly rotating it in circles. The goal is to dislodge dust trapped under the rubber skirt, not to blast it deeper — short bursts, different angles, and keep the can upright.
- Retest. Go back to the calibration screen. If the dot is still, you are done. If it has improved but still creeps, repeat once.
- Contact cleaner (optional, one careful step). If air alone did not work, a tiny amount of plastic-safe electronic contact cleaner under the stick's rubber skirt, worked in by rotating the stick, is the last no-open attempt. Let it dry fully before powering on. Use contact cleaner made for electronics only — never regular lubricating sprays, never pour in liquid, and if you are unsure, skip this step and go to the repair route instead.
What not to do: do not blow into the stick with your mouth (moisture makes it worse), do not poke tools under the skirt, and do not open the Joy-Con unless you have already accepted the warranty trade-off in the next sections.
Does Nintendo Fix Joy-Con Drift for Free?
In many cases, yes — and this is the step to check before spending money. Nintendo has repaired drifting Joy-Cons free of charge in the US and other regions, including cases outside the standard warranty, and it has operated a dedicated Joy-Con repair request page for the issue. Terms vary by region and change over time, so treat any "always free" claim with suspicion: check the current policy for your region on Nintendo's support site before paying for a repair or a replacement.
To start a repair, use Nintendo's Joy-Con repair page (joyconrepair.nintendo.com) or your regional Nintendo support site, and describe the drift you confirmed on the calibration screen. Reported turnaround varies — from a few days to a few weeks including shipping — so if you only have one pair of Joy-Cons, this is the point to borrow or pick up a spare controller for the wait. Do not open the Joy-Con first if you plan to use this route: an opened controller can complicate a free repair.
Should I Replace the Stick Myself or Buy New Joy-Cons?
Only once cleaning and the repair route are exhausted — or if you are certain the warranty is gone and you enjoy this kind of repair. A DIY stick-module swap replaces the worn potentiometer itself, which is why it works where cleaning cannot: you are swapping the failing part, not working around it. Replacement modules are widely sold online with step-by-step video and iFixit-style guides, but the job is fiddly — tiny screws, ribbon cables, and a small part that must seat exactly right. Budget an unhurried hour, and accept that opening the controller ends any remaining warranty claim.
There is one DIY option that addresses the root cause instead of repeating it: magnetic replacement sticks. Standard sticks use the same wearing potentiometer design, so a like-for-like swap can drift again in time. Magnetic (Hall-effect / TMR) modules sense position without contact, so there is nothing to wear out — third-party magnetic modules exist for original Joy-Cons, and they are the closest thing to a permanent fix. For Switch 2, stick to modules made specifically for Joy-Con 2: the magnetic attachment system changes what fits, and a generic module is a gamble. If none of that appeals, a new pair of Joy-Cons is the simple answer — just know you are buying the same potentiometer design, so the prevention tips below matter.
Does the Switch 2 Have Joy-Con Drift?
It can drift, and Switch 2 owners should not assume they are immune. Nintendo has said the Joy-Con 2 sticks are not Hall-effect sticks, and independent teardowns have found the same potentiometer-based stick technology underneath the redesigned magnetic attachment. The new sticks are better built than the originals, and early drift cases have appeared more slowly — but the wear mechanism is the same, so drift remains a matter of time and use, not a question of if.
The good news is that the fix order in this guide is identical for Joy-Con 2: test on the calibration screen, recalibrate, clean around the stick base, and use Nintendo's repair route while the console is new and the DIY market is still maturing. One Switch 2 difference matters for cleaning and repair: the controllers attach magnetically with a release button rather than sliding on rails, so detach them with the release button and never force them off.
How Do I Stop Joy-Con Drift Coming Back?
You cannot make a potentiometer last forever, but you can slow the wear down a lot. Rotate between controllers when you can — every hour in handheld mode is an hour of wear on the same small part, and spreading play across a second pair or a Pro Controller stretches each stick's life. Keep the sticks clean and dry, store the console in a case rather than loose in a bag where dust and grit get under the skirts, and avoid mashing the sticks or clicking them aggressively — hard, uneven pressure wears one side of the contact track faster.
Finally, know the difference between a fix and a mask. Some games let you raise the stick deadzone, which tells the game to ignore small inputs near centre — that hides mild drift, and it is a fine stopgap while a repair is in transit, but it does not fix the stick. If drift keeps returning after cleaning and recalibration, the track is worn, and the honest options are repair, a module swap, or magnetic sticks — not another round of cleaning.
Frequently Asked Questions
Does recalibrating fix Joy-Con drift?
Sometimes, when the drift is mild. Recalibration re-teaches the console where the stick's centre is, which corrects a small offset — but it cannot repair a worn contact track, so drift caused by real wear will come back. If recalibration and cleaning both fail, the stick needs repair or replacement.
Does Nintendo repair Joy-Con drift for free?
Nintendo has repaired drifting Joy-Cons free of charge in the US and other regions, including out-of-warranty cases, and it operates a dedicated Joy-Con repair request page. Terms vary by region and change over time, so check the current policy for your region before paying anyone else — and do not open the controller first if you plan to use the repair route.
How long does Nintendo Joy-Con repair take?
Reported turnaround varies from a few days to a few weeks including shipping, depending on region and demand. If you only own one pair of Joy-Cons, arrange a spare controller before sending yours in.
Can you fix Joy-Con drift without opening the controller?
Yes, when dust or a calibration offset is the cause: recalibrate in System Settings, then clean around the stick base with short bursts of compressed air while rotating the stick. A tiny amount of plastic-safe electronic contact cleaner under the stick skirt is the last no-open step. If none of that works, the stick is worn and needs repair or a module swap.
Does the Switch 2 have Joy-Con drift?
It can drift. Nintendo has said Joy-Con 2 sticks are not Hall-effect sticks, and teardowns found the same potentiometer-based technology as the original Joy-Cons, under a redesigned magnetic attachment. Early cases have appeared more slowly, but the wear mechanism is unchanged — and the same fix order applies.
Why is my left Joy-Con drifting?
Either Joy-Con can drift, but the left one is reported most often because in most games the left stick does the moving — it racks up far more hours of travel than the right stick, so its contact track wears first. Test both sticks on the calibration screen; the fix is the same whichever side drifts.
Should I buy new Joy-Cons or replace the stick?
Check Nintendo's repair route first — it is often free and is the cheapest real fix. If repair is not an option, a DIY module swap is cheaper than new Joy-Cons but fiddly and ends the warranty; magnetic replacement modules are the only option that removes the wear mechanism itself. New Joy-Cons are the simplest answer, but they use the same potentiometer design, so drift can return in time.